 |
| Time for some Campy snacks that require just a few random supplies and a sun-shiney day, courtesy of Shanna! |

 |
| Step One: Gather Supplies |

- Then gather up your supplies for the solar oven! You will need:
· Scissors
· Tape
· Glue Stick
· Aluminum Foil
· Plastic Wrap
· Pencil/Stick/Anything that can be used to prop up the box
· Box with flap (pizza box, shoe box). You can use any size. If you don’t have a box with a flap, you can tape one of the sides to the lid. If box has any holes, you can tape over these.
 |
| Step Two: Prep Your Box |
- Patch any holes or attach the lid to your box if you don’t have a lid that is already attached.
 |
| Step Three: Starting Your Solar Oven |
- Cut hole in lid on three sides to create a flap
 |
| Step Four: Aluminum Foil |
- Using your glue stick, cover inside of flap with aluminum foil. This will be propped up when cooking to reflect the sun into your oven.
- Then line the bottom of your box with...
 |
| Step Five: Plastic Wrap |
- Cover both sides of opening on lid with a layer of plastic wrap. This will allow the sunlight to radiate into your oven, but then trap the heat inside.
 |
| Step Six: Place Your Oven |

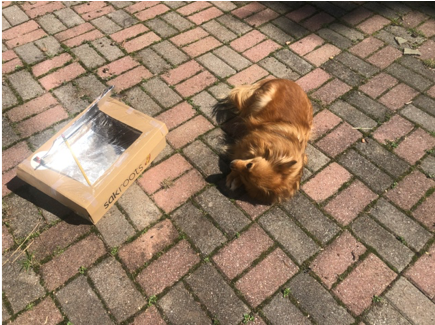
- Your Solar Oven is done!! Place box in an area with as much direct sunlight as possible. Kat decided to join me for the cooking process.
- You can place your oven in front of a window that receives sunlight or place it outside.
- The more direct sunlight, the quicker your food will cook.
- You can place your oven in front of a window that receives sunlight or place it outside.
- The more direct sunlight, the quicker your food will cook.
 |
| Step Seven: The Prop |
- As you can see in the last picture, I attempted to use one pencil as a prop, but the wind disagreed with this idea, and kept blowing down the flap. So, I tried two pencils!
- Unfortunately, the wind did not like this idea either. After a few other failed attempts, I found that taping the pencil to the flap and lid was the best option for me.

- Play around with your prop for the lid to find the best way to keep the flap up.
- And then we wait…
- I preheated for about 30 min. But you may want to do a little longer depending on how direct the sunlight is.
- Unfortunately, the wind did not like this idea either. After a few other failed attempts, I found that taping the pencil to the flap and lid was the best option for me.

- Play around with your prop for the lid to find the best way to keep the flap up.
 |
| Step Eight: Preheating |
- And then we wait…
- I preheated for about 30 min. But you may want to do a little longer depending on how direct the sunlight is.
 |
| Step Nine: Prepare S’mores…or whatever food combination your are using |
- For S’mores the chocolate melts much quicker than the marshmallow, so only place the marshmallow and graham cracker in first.
- I used a baking tray, and placed my S’mores in the oven using this, but you can also place them in directly.
 |
| Step Ten: Bake |
- Depending on the temperature and sunlight this can take a while for the marshmallow to soften. It took mine about an hour.
 |
| Step Eleven: Add Chocolate |
- Once marshmallow is soft, place chocolate and graham cracker and smush down. Wait another 15-30 min.
- Try to place the chocolate as quickly as possible to prevent heat from escaping
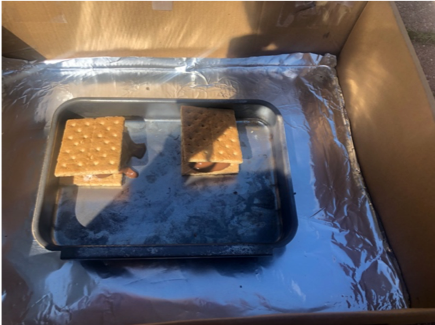 |
| Step Twelve: Results! |
- After the chocolate is melted, you are ready to eat!
 |
| Are there easier ways to make S’mores at home? Probably. But why do that when you can take two hours to make a solar oven cooked S’more? |
 |
| And, if it doesn't quite heat up - a rare (or raw) s'more is a pretty Campy treat too! |
A fun craft AND I get to eat food! What’ll they think of next!
ReplyDelete