Tuesday, April 28, 2020

Tech Free Challenge: Slimeball with Alyssa!

Time to get a little zany, get a little slimy, and to lose a little stress with Alyssa!


(This project is super cool, and uses some super random household items! Please don't use ANY without parental permission. And perhaps, parental assistance. I know. Sorry, parents. Sorry.)


Making a Slime Stress Ball!


For this project, you’ll need liquid glue, shaving cream, contact solution, paint (optional), and cotton balls (optional).


Start off by putting about half a bottle of liquid glue into a medium sized bowl.


Add your shaving cream- use a little bit more shaving cream than the amount of glue you used. 

Mix those up!

The next step is optional.

Add some paint (this will be the color of your stress ball).
Mix all of that together.

Add contact solution to your mixture. Mix.  Keep adding more contact solution until your mixture becomes slime. It shouldn’t stick to your hands or clothes by the time you’re done. If you want to stop at this step- feel free! Have fun with your slime! If you want to make a stress ball, keep going!

Next, you should make your slime flat. Then rip up some cotton balls and place them on your slime as shown in the picture.

Then fold the cotton into the slime. Play with the slime a bit to make sure the cotton is distributed throughout. Repeat this step three or four times until your stress ball is the consistency you want. 


Then shape your stress ball and you are all done!


Thanks for sliming with us!

Friday, April 24, 2020

Virtual Vespers for 4.23.20

To celebrate the end of our FOURTH week of Virtual Vespers, our intrepid Camp staff member/volunteer/closing campfire banjo-ist extraordinaire has put together something pretty special. Enjoy.


See you next week, back on Vespers Island.

Wednesday, April 22, 2020

Virtual Vespers for 4.21.20


Back to Vespers Island for another week of evening messages from our Summer Camp Staff...so, please, a warm welcome for...Bridget!


Monday, April 20, 2020

Tech Free Challenge: The Neral's Water Bottle Planter

Time to get some green growth in the comfort of your own home, courtesy of The Neral Neral!


Coming to you with some tech free activities for everyone to bring the Canoenity Garden into their homes! I included directions, and how to in photos! -The Plant Kid Neral


Can't wait to see what grows!


Friday, April 17, 2020

Virtual Vespers Bonus: Outtakes

After another week of Virtual Vespers, we thought we'd take you on a trip behind the scenes to show what goes into some of evening messages we're beaming your way...


Suffice to say, the Vespers you saw on Tuesday from our own T-Nivi wasn't quite his first take...


Virtual Vespers for 4.16.20


Wednesday, April 15, 2020

Virtual Vespers for 4.14.20


Another week of Virtual Vespers!

To start it off, we're LIVE from 4-H Camp again - but not on Vespers Island...no, we're taking an exclusive trip to a rarely seen corner of Camp...the bunkhouse kitchen!


Monday, April 13, 2020

Tech Free Challenge: Shanna's Sunshine S'mores!


Time for some Campy snacks that require just a few random supplies and a sun-shiney day, courtesy of Shanna!


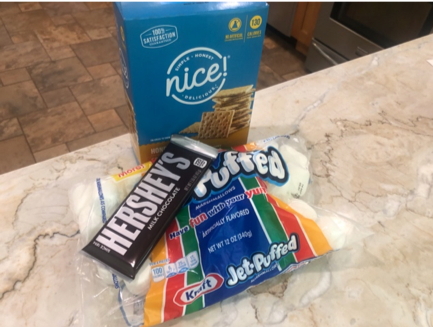
Step One: Gather Supplies 


- First get your S’mores ingredients together. If you don’t have an ingredient, get creative! Use a cookie instead of a graham cracker or bananas instead of a marshmallow. Make a combination out of food you already have in the house. 


- Then gather up your supplies for the solar oven! You will need:

· Scissors

· Tape

· Glue Stick

· Aluminum Foil

· Plastic Wrap

· Pencil/Stick/Anything that can be used to prop up the box

· Box with flap (pizza box, shoe box). You can use any size. If you don’t have a box with a flap, you can tape one of the sides to the lid. If box has any holes, you can tape over these.


Step Two: Prep Your Box


- Patch any holes or attach the lid to your box if you don’t have a lid that is already attached.

 Step Three: Starting Your Solar Oven


- Cut hole in lid on three sides to create a flap


Step Four: Aluminum Foil


- Using your glue stick, cover inside of flap with aluminum foil. This will be propped up when cooking to reflect the sun into your oven.

- Then line the bottom of your box with...


Step Five: Plastic Wrap


- Cover both sides of opening on lid with a layer of plastic wrap. This will allow the sunlight to radiate into your oven, but then trap the heat inside.


Step Six: Place Your Oven


- Your Solar Oven is done!! Place box in an area with as much direct sunlight as possible. Kat decided to join me for the cooking process.

- You can place your oven in front of a window that receives sunlight or place it outside.

- The more direct sunlight, the quicker your food will cook.


Step Seven: The Prop

- As you can see in the last picture, I attempted to use one pencil as a prop, but the wind disagreed with this idea, and kept blowing down the flap. So, I tried two pencils!

- Unfortunately, the wind did not like this idea either. After a few other failed attempts, I found that taping the pencil to the flap and lid was the best option for me.


Play around with your prop for the lid to find the best way to keep the flap up.


Step Eight: Preheating

- And then we wait…

- I preheated for about 30 min. But you may want to do a little longer depending on how direct the sunlight is.


Step Nine: Prepare S’mores…or whatever food combination your are using


- For S’mores the chocolate melts much quicker than the marshmallow, so only place the marshmallow and graham cracker in first.

- I used a baking tray, and placed my S’mores in the oven using this, but you can also place them in directly.


Step Ten: Bake


- Depending on the temperature and sunlight this can take a while for the marshmallow to soften. It took mine about an hour.


Step Eleven: Add Chocolate

- Once marshmallow is soft, place chocolate and graham cracker and smush down. Wait another 15-30 min.

- Try to place the chocolate as quickly as possible to prevent heat from escaping

Step Twelve: Results! 

- After the chocolate is melted, you are ready to eat!


Are there easier ways to make S’mores at home? Probably. But why do that when you can take two hours to make a solar oven cooked S’more?


And, if it doesn't quite heat up - a rare (or raw) s'more is a pretty Campy treat too!